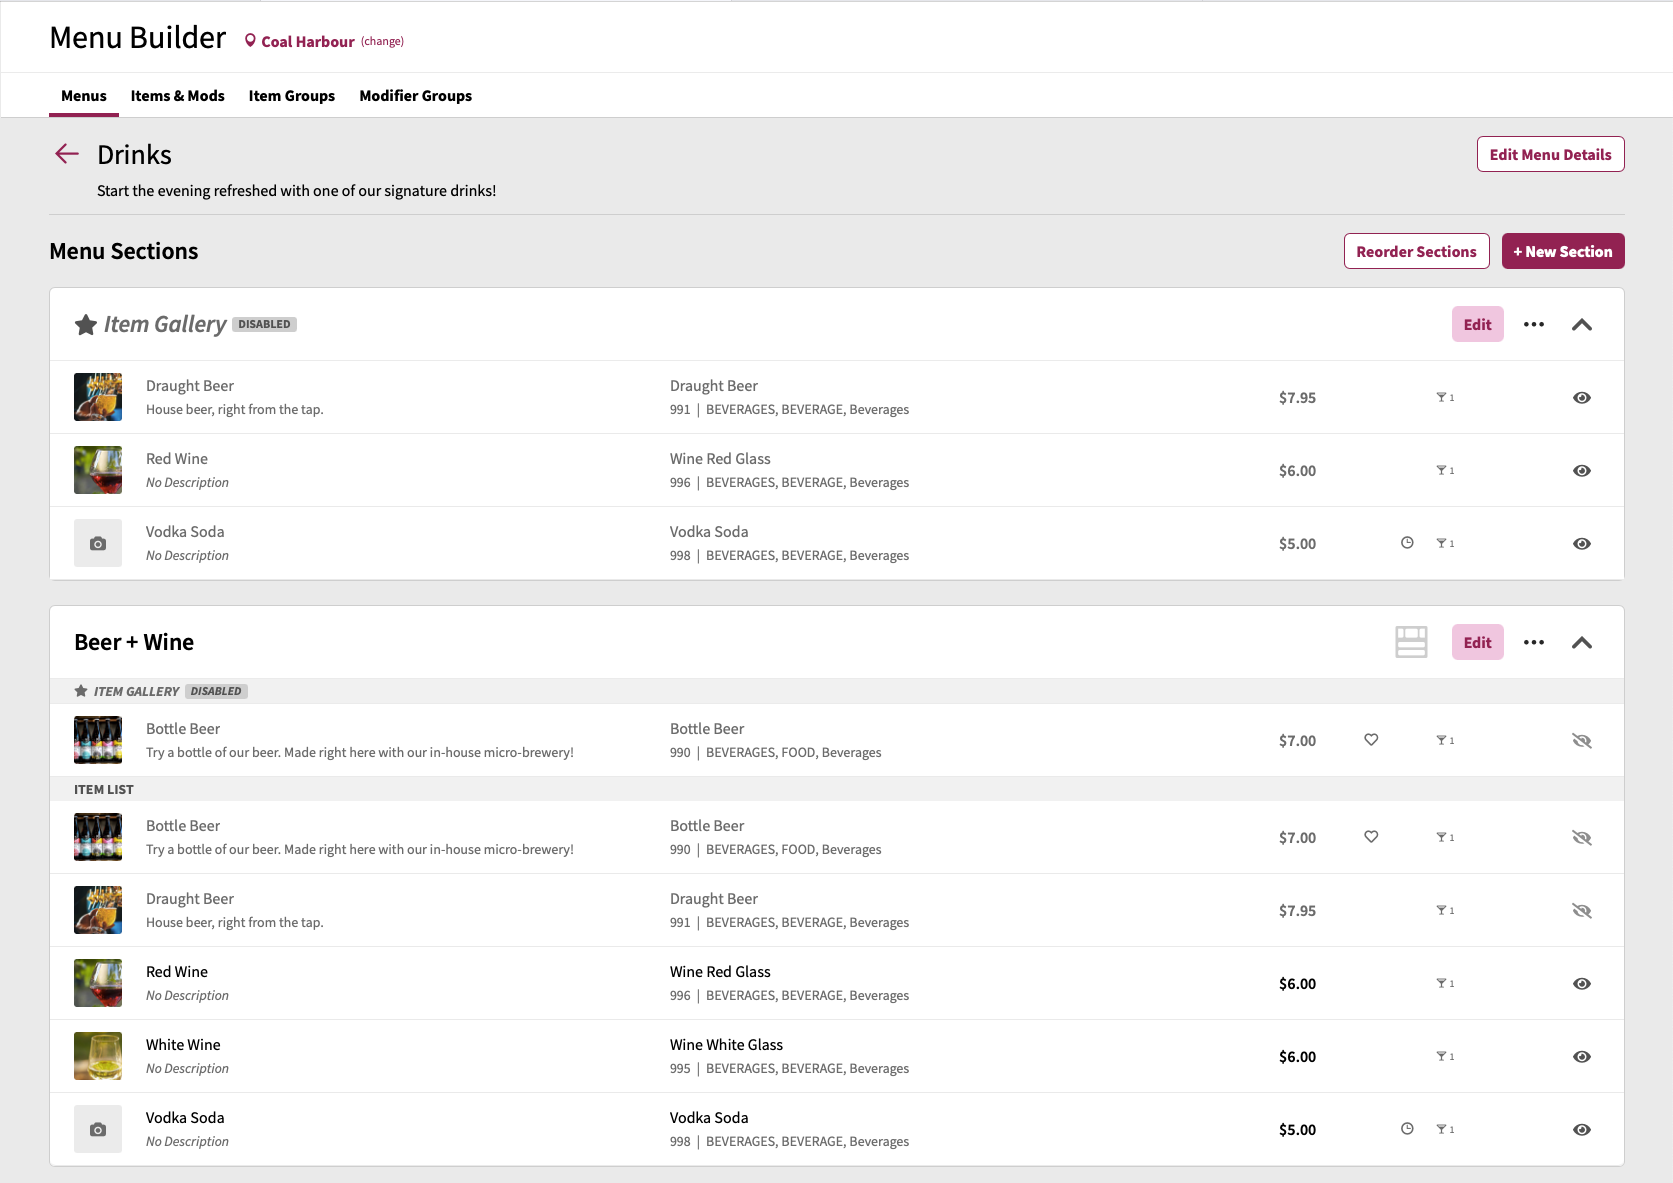
Upon creating a new menu or clicking on an existing menu, you will be brought to the details screen for the menu, where you can configure the details of what appears on your menu, such as the menu name and description, schedule, menu status and sections.

The Menu Details screen mainly comprises of three key areas:
- Menu Header: this is the section which displays the menu name, description, as well as an Edit Menu Details button
- Menu Item Gallery: this is the area where you can configure a menu-level item gallery for the selected menu
- Sections: this is the area where you can create, edit, reorder, and delete sections of the menu
Menu Header
The Menu Header area by default only displays the currently opened menu's name, as well as an Edit Menu Details button. Clicking the button will transform the menu header area into a form in which you can set the following menu settings:
- Menu Name: Allows you to name the menu which is displayed for guests on their devices
- Description: Allows you to provide a description of the menu which will be shown to guests viewing the ordering menu on their devices
- Set Schedule: Allows you to define a schedule in which a menu is either visible during or not visible during (for more information on creating schedules, please refer to the Schedules documentation)
- When a menu does not currently have any assigned schedules, the header section will show a Set Schedule link which, when clicked, will reveal the ability to se schedule(s)
- When a menu already has assigned schedules, the header section will show the currently configured schedule(s) and how the schedules are applied to the menu. There are two application types that can be selected from:
- Show during: When this option is set, the menu will be visible to guests during the assigned schedule(s) time periods
- Hide during: When this option is set, the menu will not be visible to guests during the assigned schedule(s) time periods, and will only be visible outside of the time period(s)
- Menu Status: Allows you to identify if a menu is enabled (visible to guests) or disabled (not visible to guests)

Item Gallery
Within a menu, you can configure one item gallery which will appear to guests at the top of the menu. Item Galleries offer a differentiated view of items (up to 5 items) for guests by offering a card-style, horizontal experience. In the example below, the Hot Sellers are a menu-level item gallery associated to the Drinks menu.

Configuring Menu-level Item Gallery
By default, when a menu is created, the menu-level item gallery is disabled. Configuring the menu-level item gallery can be configured right in the specific menu screen by:
- Click Edit button for the Item Gallery
- The gallery edit form allows you to configure the following:
- Item Gallery Name (optional, will appear to guests)
- Item Gallery Description (optional, will appear to guests)
- Gallery Items
- To add items, click + Add Items
- Using the Add Items screen, search for and select items and/or item groups to add to the gallery
- Click Done
- Status (to show the gallery to guests, set Status to Enabled)
- Click Save Changes
Sections
The Sections area will contain a listing of currently created sections in your menu, in the order in which they appear to guests when viewing the menu. In this section you can add new sections, reorder sections, and configure section details.
