Assigning a Shared Modifier
Assigning is necessary so that items that are not sold at that location do not appear there. If a shared menu is set on a location without that modifier assigned, it will not appear on that location's menu.
To assign the modifier you have just created, select the "Assigned locations" heading. If you want to assign a previously created modifier, find the Items & Mods tab, search for your item, and click on it, this will open the edit details screen. Select the "Assigned Locations" heading.

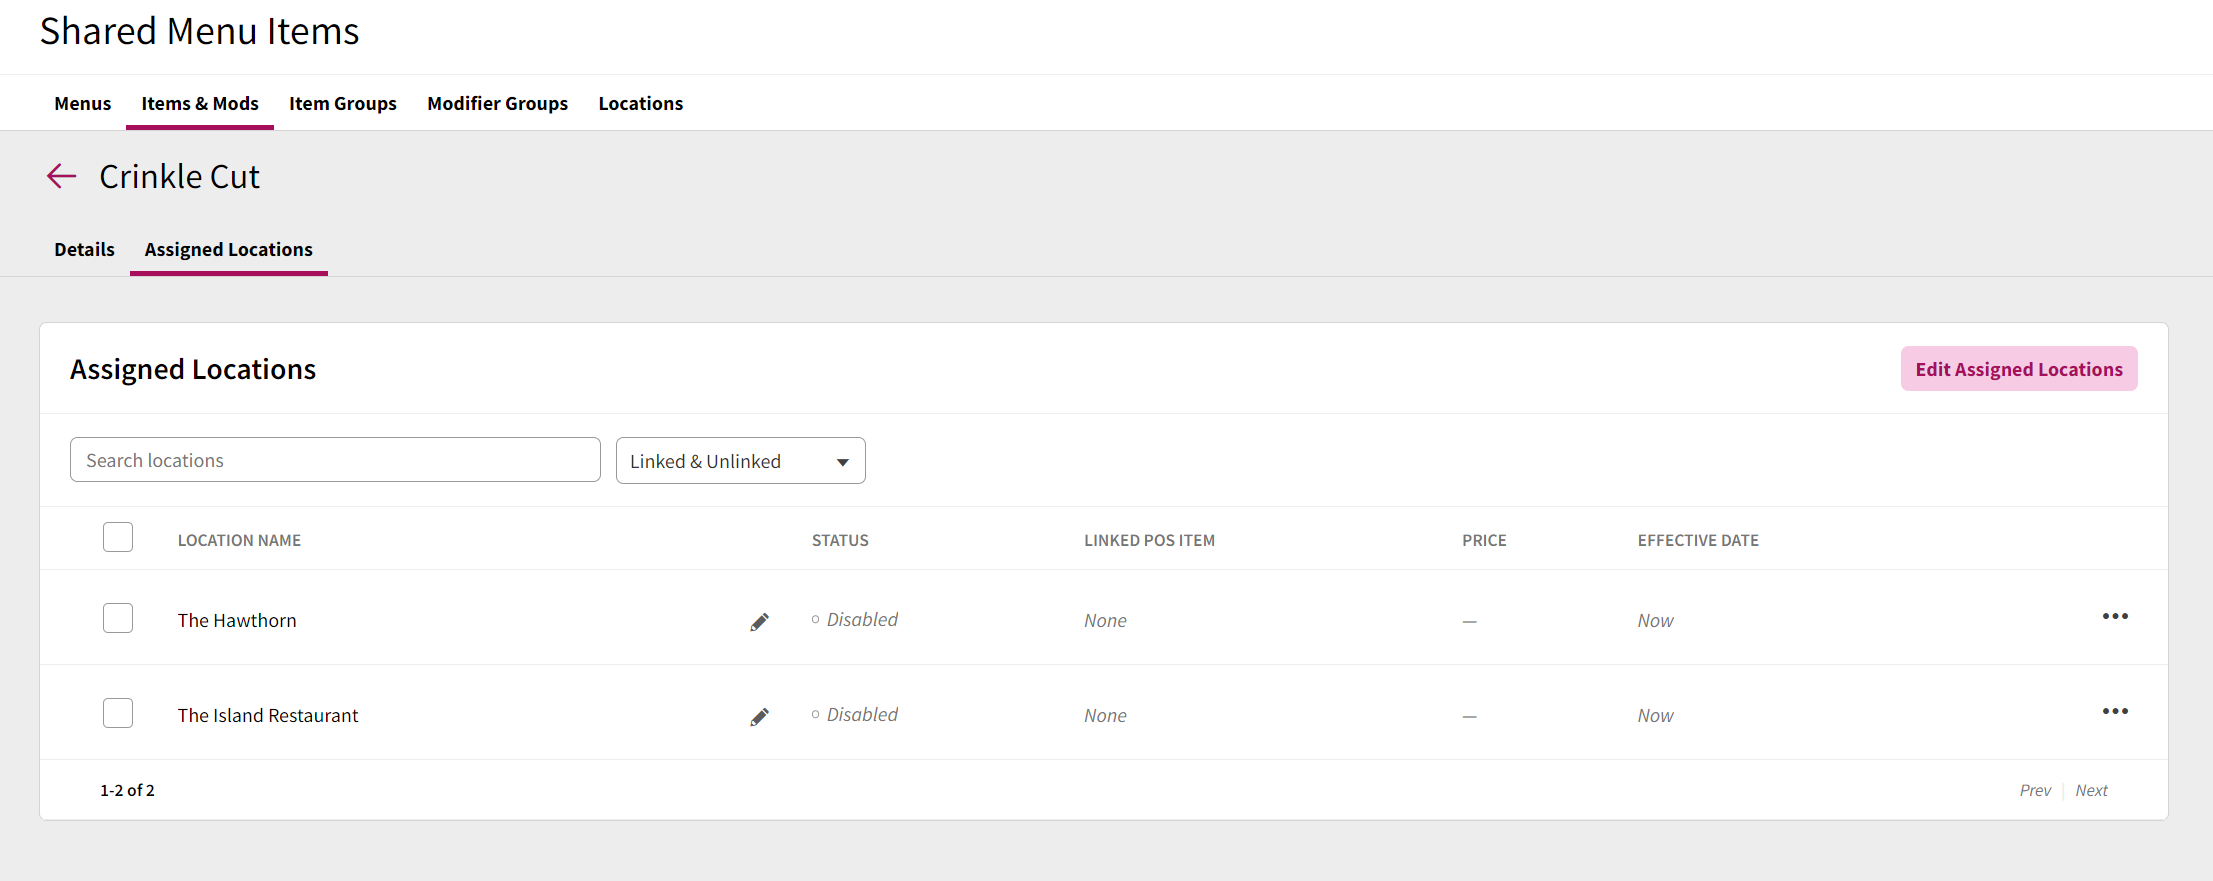
To assign the modifier to a location, select "Edit Assigned Locations" this will show a list of all locations in the company. There is the option to individually assign locations, or to assign to all locations at once.
Once the item is assigned to a location and the changes are saved, the location will appear in the assigned locations list.
Once the modifier is assigned to the correct locations, you can now adjust the location-specific information. This is information that can quite often vary between specific locations.
Editing a single location's information
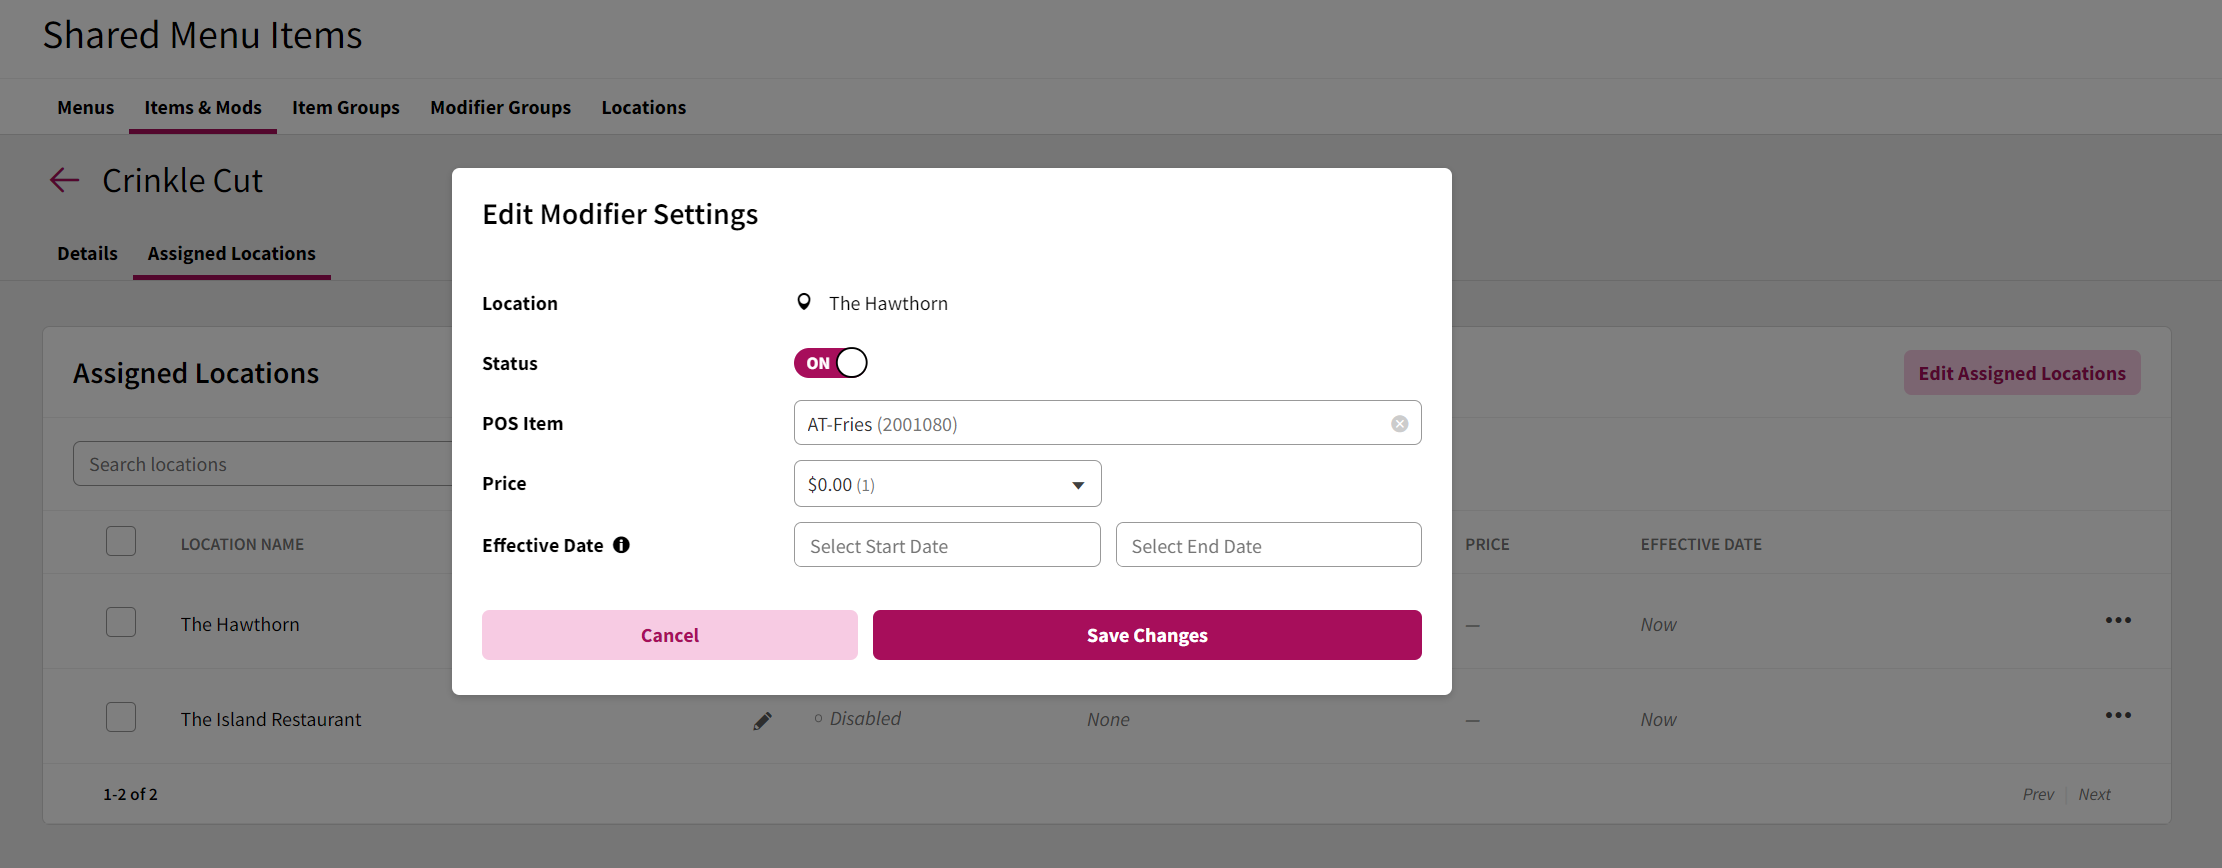
To adjust the POS specific information, click the pencil icon on the right hand side of the location and the edit box will appear

The following fields can be edited in this window
Status
This status determines whether the item is enabled (on) or disabled (off). Disabling an item will hide the item on any menu(s) and item group(s) from guests viewing the menu on their devices.
POS Item
This setting sets the POS Item code that the item is linked to from your POS item. Items must be linked to a POS Item by clicking Link Item before you are able to set the Status to On.
Square POS: In order to select Item Option Sets from Square POS in the item configuration screen in Ready Dashboard, please follow Price Levels and Option Sets instructions available on the Square POS/Payments/Loyalty Getting Started Guide article.
Price
This field will allow you to set the price for the item based on the price(s) pulled from your POS. Newly created items will use the default price but can be changed to any other price level defined by your POS.
Effective Date
The Effective Date fields allow you to plan ahead for menu changes by setting a start and/or end date for an item. When a start and/or end date is assigned to an item, the item will not appear to guests viewing your mobile ordering menu if the current date is before the start date / after the end date, even if the item is currently added to one or more of your menus.
Editing several location's information
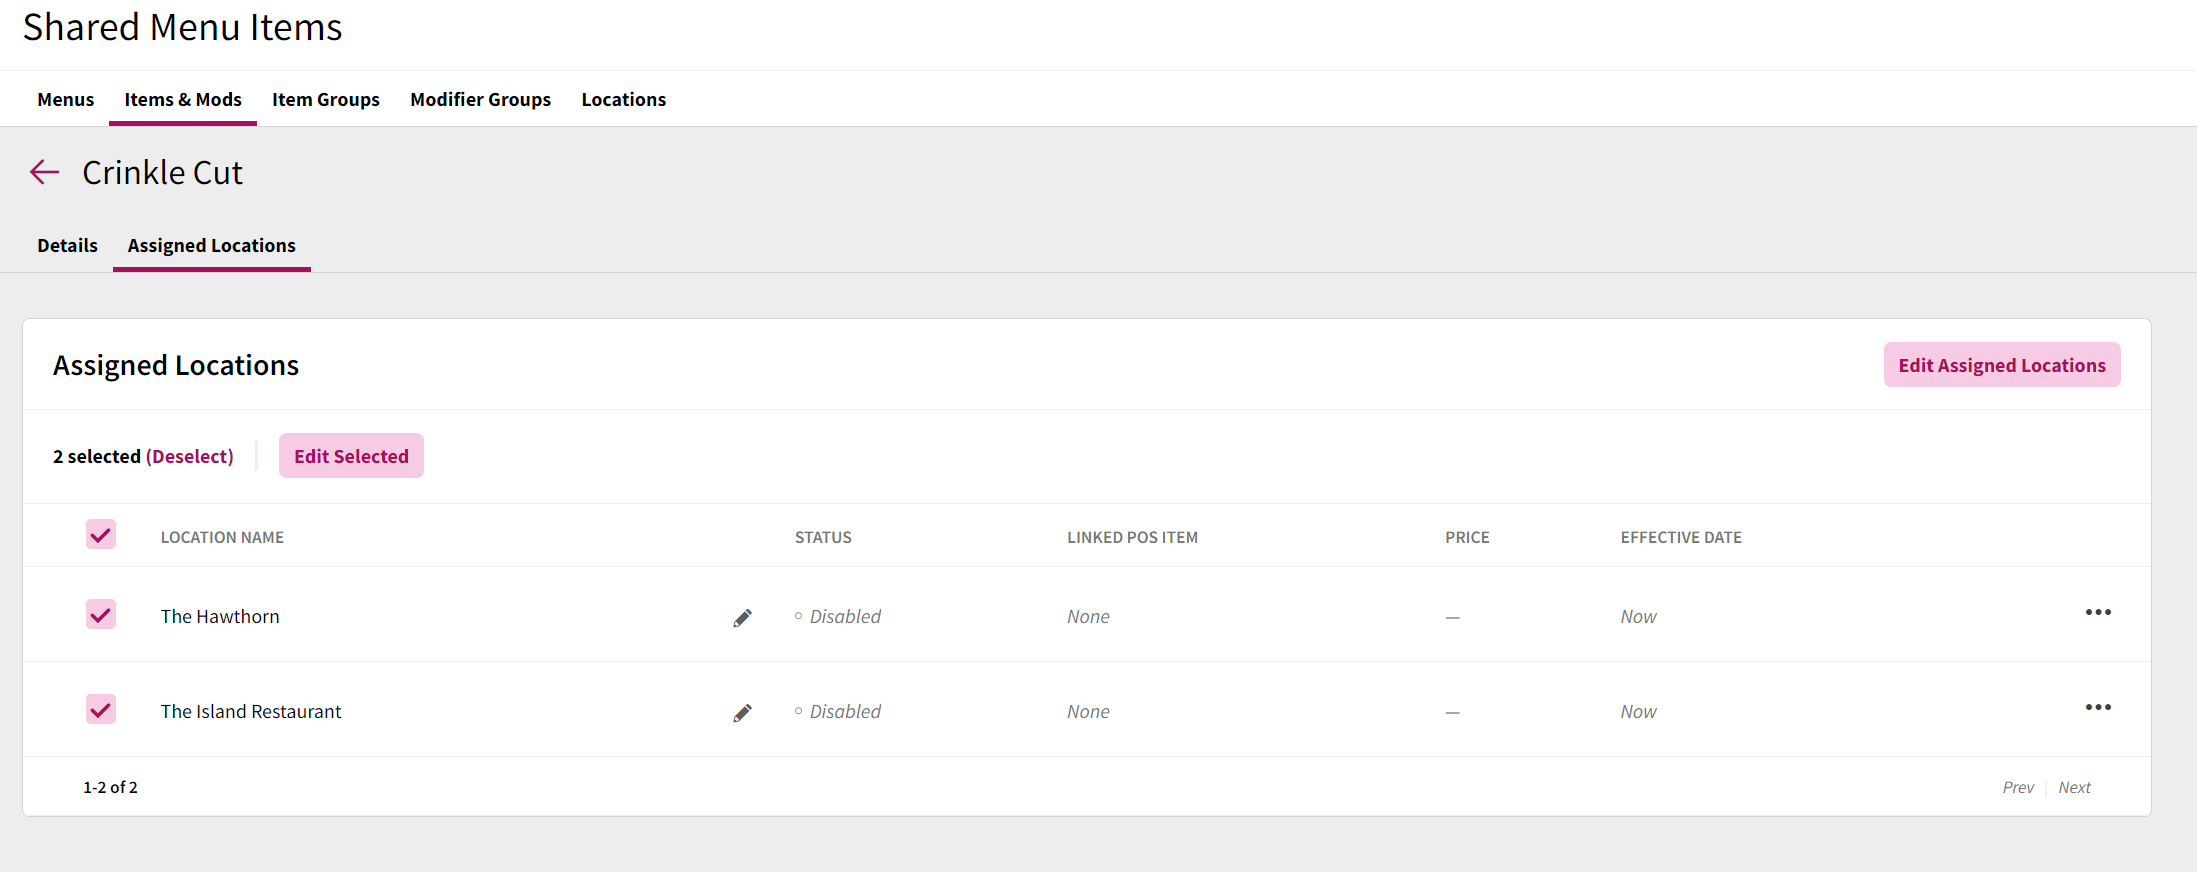
To edit several location's information, select the box on the left hand side of the location name, and select "Edit Selected"
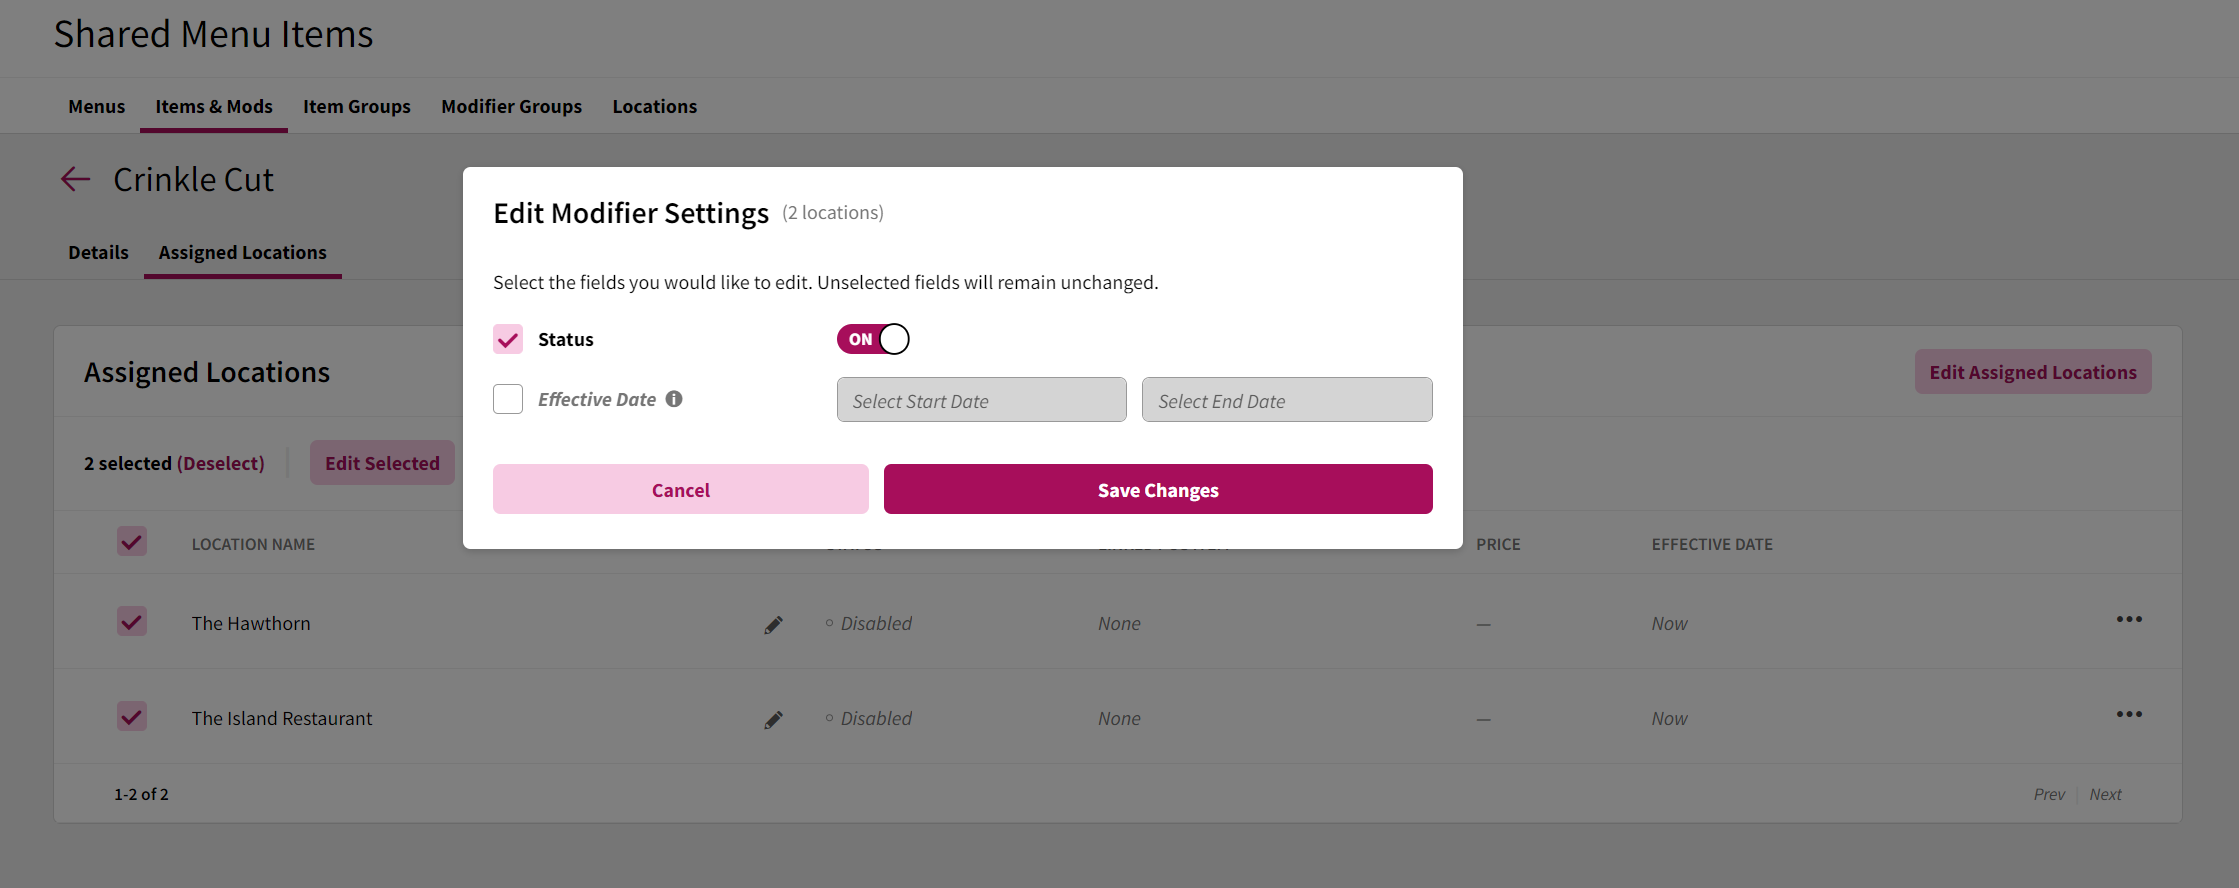
To edit fields, select the tick box next to the field you want to edit. If you enable the "Schedule" editing, but leave the field blank, it will remove all effective date information on all locations that were selected.


This only allows you to edit Status and Effective Date. It does not allow configuration of any POS settings, as POS systems are controlled by our integration to each location's POS and cannot be adjusted across several locations at once.